![]()
Exam Questions and Answers for CKA Study Guide Questions and Answers!
Certified Kubernetes Administrator (CKA) Program Exam Certification Sample Questions and Practice Exam
Linux Foundation CKA (Certified Kubernetes Administrator) Program Certification Exam is a valuable certification for professionals seeking to demonstrate their expertise in managing Kubernetes clusters. Certified Kubernetes Administrator (CKA) Program Exam certification exam tests the candidate's practical skills in deploying and managing Kubernetes clusters effectively. Certified Kubernetes Administrator (CKA) Program Exam certification has become a benchmark for Kubernetes expertise in the industry and provides a competitive edge to the candidate. Passing the CKA certification exam demonstrates the candidate's commitment to keeping up with the latest industry trends and technologies.
The CKA exam is a hands-on, practical test that requires candidates to perform tasks on a live Kubernetes cluster. CKA exam is conducted online and comprises of 24 performance-based tasks that must be completed within 3 hours. To pass the exam, candidates must score 74% or higher. The CKA certification is valid for three years, after which candidates can renew their certification by passing a recertification exam. The CKA program provides a proven path to career advancement and recognition as a Kubernetes expert.
NEW QUESTION # 40
Create a NetworkPolicy which denies all ingress traffic
- A. apiVersion: networking.k8s.io/v1
kind: NetworkPolicy
metadata:
name: default-deny
spec:
podSelector: ()
policyTypes:
- Ingress - B. apiVersion: networking.k8s.io/v1
kind: NetworkPolicy
metadata:
name: default-deny
spec:
podSelector: {}
policyTypes:
- Ingress
Answer: B
NEW QUESTION # 41
Create a deployment as follows:
* Name:nginx-app
* Using containernginxwithversion 1.11.10-alpine
* The deployment should contain3replicas
Next, deploy the application with newversion1.11.13-alpine, byperforming a rolling update.
Finally, rollback that update to theprevious version1.11.10-alpine.
Answer:
Explanation:
See the solution below.
Explanation
solution


NEW QUESTION # 42
Create a snapshot of the etcd instance running at https://127.0.0.1:2379, saving the snapshot to the file path
/srv/data/etcd-snapshot.db.
The following TLS certificates/key are supplied for connecting to the server with etcdctl:
CA certificate: /opt/KUCM00302/ca.crt
Client certificate: /opt/KUCM00302/etcd-client.crt
Client key: Topt/KUCM00302/etcd-client.key
Answer:
Explanation:
See the solution below.
Explanation
solution
F:\Work\Data Entry Work\Data Entry\20200827\CKA\18 C.JPG
NEW QUESTION # 43
You have a two-tier application with a frontend service 'frontend-svc' exposing a Node.js application running in pods labeled 'app: frontend', and a backend service 'backend-svc' exposing a Python application running in pods labeled 'app: backend'. The frontend pods need to communicate with the backend pods through a service. Design a Kubernetes network setup that allows the frontend pods to access the backend service, ensuring that the backend service is reachable only by the frontend service and not directly from outside the cluster.
Answer:
Explanation:
See the solution below with Step by Step Explanation.
Explanation:
Solution (Step by Step) :
1. Create a Service for the Backend:
- Define a Service for the backend pods:
- This Service creates a ClusterlP service, accessible only within the cluster. The 'targetPort' specifies the port exposed by the backend pods. 2. Create a Service for the Frontend: - Define a Service for the frontend pods:
- This Service creates a LoadBalancer service, accessible from outside the cluster. 3. Configure NetworkPolicy for the Frontend Service: - Define a NetworkPolicy that allows traffic from the 'frontend-svc' to the 'backend-svc':
- This NetworkPolicy allows ingress traffic from the 'frontend-svc' and egress traffic to the 'backend-svc'. 4. Apply the Configurations: - Apply the YAML files using 'kubectl apply -f backend-svc.yaml' , 'kubectl apply -f frontend-svc.yamr , and kubectl apply -f frontend-to-backend.yamr. 5. Verification: - Check the status of the services: 'kubectl get services' - Check the network policy status: 'kubectl get networkpolicies' Now, the frontend pods can communicate with the backend service through the 'backend-svc' service. External clients can access the frontend application through the 'frontend-svc' service. The backend service is not accessible directly from outside the cluster due to the NetworkPolicy restricting traffic from external sources. ]
NEW QUESTION # 44
Perform the following tasks:
* Add an init container to hungry-bear (which has been defined in spec file
/opt/KUCC00108/pod-spec-KUCC00108.yaml)
* The init container should create an empty file named/workdir/calm.txt
* If /workdir/calm.txt is not detected, the pod should exit
Answer:
Explanation:
* Once the spec file has been updated with the init container definition, the pod should be created See the solution below.
Explanation
solution


NEW QUESTION # 45
Create the nginx pod with version 1.17.4 and expose it on port 80
Answer:
Explanation:
kubectl run nginx --image=nginx:1.17.4 --restart=Never -- port=80
NEW QUESTION # 46
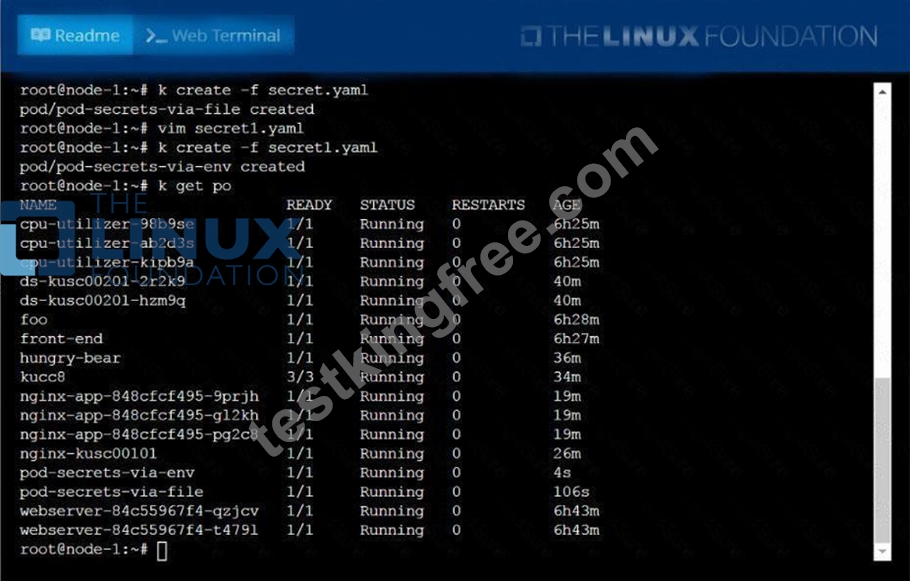
Create a Kubernetes secret as follows:
* Name: super-secret
* password: bob
Create a pod named pod-secrets-via-file, using the redis Image, which mounts a secret named super-secret at
/secrets.
Answer:
Explanation:
Create a second pod named pod-secrets-via-env, using the redis Image, which exports password as CONFIDENTIAL See the solution below.
Explanation
solution

NEW QUESTION # 47
Create a persistent volume with name app-data, of capacity 2Gi and access mode ReadWriteMany. The type of volume is hostPath and its location is /srv/app-data.
Answer:
Explanation:
See the solution below.
Explanation
solution
Persistent Volume
A persistent volume is a piece of storage in a Kubernetes cluster. PersistentVolumes are a cluster-level resource like nodes, which don't belong to any namespace. It is provisioned by the administrator and has a particular file size. This way, a developer deploying their app on Kubernetes need not know the underlying infrastructure. When the developer needs a certain amount of persistent storage for their application, the system administrator configures the cluster so that they consume the PersistentVolume provisioned in an easy way.
Creating Persistent Volume
kind: PersistentVolumeapiVersion: v1metadata: name:app-dataspec: capacity: # defines the capacity of PV we are creating storage: 2Gi #the amount of storage we are tying to claim accessModes: # defines the rights of the volume we are creating - ReadWriteMany hostPath: path: "/srv/app-data" # path to which we are creating the volume Challenge
* Create a Persistent Volume named ReadWriteMany, storage classname
shared, 2Gi of storage capacity and the host path
2. Save the file and create the persistent volume.
Image for post
3. View the persistent volume.
* Our persistent volume status is available meaning it is available and it has not been mounted yet. This status will change when we mount the persistentVolume to a persistentVolumeClaim.
PersistentVolumeClaim
In a real ecosystem, a system admin will create the PersistentVolume then a developer will create a PersistentVolumeClaim which will be referenced in a pod. A PersistentVolumeClaim is created by specifying the minimum size and the access mode they require from the persistentVolume.
Challenge
* Create a Persistent Volume Claim that requests the Persistent Volume we had created above. The claim should request 2Gi. Ensure that the Persistent Volume Claim has the same storageClassName as the persistentVolume you had previously created.
kind: PersistentVolumeapiVersion: v1metadata: name:
spec:
accessModes: - ReadWriteMany
requests: storage: 2Gi
storageClassName: shared
2. Save and create the pvc
njerry191@cloudshell:~ (extreme-clone-2654111)$ kubect1 create -f app-data.yaml persistentvolumeclaim/app-data created
3. View the pvc
Image for post
4. Let's see what has changed in the pv we had initially created.
Image for post
Our status has now changed from available to bound.
5. Create a new pod named myapp with image nginx that will be used to Mount the Persistent Volume Claim with the path /var/app/config.
Mounting a Claim
apiVersion: v1kind: Podmetadata: creationTimestamp: null name: app-dataspec: volumes: - name:congigpvc persistenVolumeClaim: claimName: app-data containers: - image: nginx name: app volumeMounts: - mountPath: "/srv/app-data " name: configpvc
NEW QUESTION # 48
List the nginx pod with custom columns POD_NAME and POD_STATUS
Answer:
Explanation:
kubectl get po -o=custom-columns="POD_NAME:.metadata.name,
POD_STATUS:.status.containerStatuses[].state"
NEW QUESTION # 49
Print pod name and start time to "/opt/pod-status" file
Answer:
Explanation:
kubect1 get pods -o=jsonpath='{range .items[*]}{.metadata.name}{"\t"}{.status.podIP}{"\n"}{end}'
NEW QUESTION # 50
Create a Pod with three busy box containers with commands "ls; sleep 3600;", "echo Hello World; sleep 3600;" and "echo this is the third container; sleep 3600" respectively and check the status
- A. // first create single container pod with dry run flag
kubectl run busybox --image=busybox --restart=Always --dry-run
-o yaml -- bin/sh -c "sleep 3600; ls" > multi-container.yaml
// edit the pod to following yaml and create it
apiVersion: v1
kind: Pod
metadata:
labels:
run: busybox
name: busybox
spec:
containers:
- args:
- bin/sh
- -c
- ls; sleep 3600
image: busybox
name: busybox-container-1
- args:
- bin/sh
- -c
- echo Hello world; sleep 3600
image: busybox
name: busybox-container-2
- args:
- bin/sh
- -c
- echo this is third container; sleep 3600
image: busybox
name: busybox-container-3
restartPolicy: Always
// Verify
Kubectl get pods - B. // first create single container pod with dry run flag
kubectl run busybox --image=busybox --restart=Always --dry-run
-o yaml -- bin/sh -c "sleep 3600; ls" > multi-container.yaml
// edit the pod to following yaml and create it
apiVersion: v1
kind: Pod
metadata:
labels:
run: busybox
name: busybox
spec:
containers:
- args:
- bin/sh
- -c
- ls; sleep 3600
- echo Hello world; sleep 3600
image: busybox
name: busybox-container-2
- args:
- bin/sh
- -c
- echo this is third container; sleep 3600
image: busybox
name: busybox-container-3
restartPolicy: Always
// Verify
Kubectl get pods
Answer: A
NEW QUESTION # 51
Create a Cronjob with busybox image that prints date and hello from kubernetes cluster message for every minute
- A. CronJob Syntax:
* --> Minute
* --> Hours
* --> Day of The Month
* --> Month
* --> Day of the Week
*/1 * * * * --> Execute a command every one minutes.
vim date-job.yaml
apiVersion: batch/v1beta1
kind: CronJob
metadata:
name: date-job
spec:
schedule: "*/1 * * * *"
jobTemplate:
spec:
template:
spec:
containers:
- name: hello
image: busybox
args:
- /bin/sh
- -c
- date; echo Hello from the Kubernetes cluster
restartPolicy: OnFailure
kubectl apply -f date-job.yaml
//Verify
kubectl get cj date-job -o yaml - B. CronJob Syntax:
* --> Minute
* --> Hours
* --> Day of The Month
* --> Month
* --> Day of the Week
*/1 * * * * --> Execute a command every one minutes.
vim date-job.yaml
apiVersion: batch/v1beta1
kind: CronJob
metadata:
name: date-job
spec:
schedule: "*/1 * * * *"
jobTemplate:
spec:
template:
- /bin/sh
- -c
- date; echo Hello from the Kubernetes cluster
restartPolicy: OnFailure
kubectl apply -f date-job.yaml
//Verify
kubectl get cj date-job -o yaml
Answer: A
NEW QUESTION # 52
Create a pod that echo "hello world" and then exists. Have the pod deleted automatically when it's completed
Answer:
Explanation:
See the solution below.
Explanation
kubectl run busybox --image=busybox -it --rm --restart=Never --
/bin/sh -c 'echo hello world'
kubectl get po # You shouldn't see pod with the name "busybox"
NEW QUESTION # 53
Get the pods with label env=dev and output the labels
Answer:
Explanation:
kubectl get pods -l env=dev --show-labels
NEW QUESTION # 54
You are deploying an application on Kubernetes that requires access to a specific external service. This service is only accessible from the cluster network. Describe how you can implement a NetworkPolicy to secure access to the external service from the application pods.
Answer:
Explanation:
See the solution below with Step by Step Explanation.
Explanation:
Solution (Step by Step) :
1 . Create a NetworkPolicy for the Application Pods:
- Define a NetworkPolicy rule that allows ingress traffic from the application pods to the external service. This policy should be applied to the namespace where the application pods are running.
2. Configure Network Access to the External Service: - Ensure that the external service is accessible from the cluster network. This might involve using a dedicated load balancer, a service proxy, or a network tunnel. 3. Implement a Service for the External Service: - Create a Kubernetes Service to represent the external service and expose it within the cluster. This service can be a headless service, which doesn't provide a public endpoint, as the external service is only accessible from the cluster network.
4. Verify Network Policy Configuration: - Verify that the NetworkPolicy is applied correctly and that the application pods can access the external service. Use 'kubectl get networkpolicies myapp-networkpolicy' to check the policy status and 'kubectl describe pod myapp-XXXX' (where XXXX is a pod name) to check the pod's network configuration.
NEW QUESTION # 55
Allow traffic from all the pods in "web" namespace and from pods
with label "type=monitoring" to the pods matching label "app: db"
- A. kubectl create namespace web
kubectl label namespace/web app=web
vim web-allow-all-ns-monitoring.yaml
apiVersion: networking.k8s.io/v1
kind: NetworkPolicy
metadata:
name: web-allow-all-ns-monitoring
namespace: default
spec:
podSelector:
podSelector:
matchLabels:
type: monitoring
k kubectl apply -f web-allow-all-ns-monitoring.yaml - B. kubectl create namespace web
kubectl label namespace/web app=web
vim web-allow-all-ns-monitoring.yaml
apiVersion: networking.k8s.io/v1
kind: NetworkPolicy
metadata:
name: web-allow-all-ns-monitoring
namespace: default
spec:
podSelector:
matchLabels:
app: db
ingress:
- from:
- namespaceSelector:
matchLabels:
app: web
podSelector:
matchLabels:
type: monitoring
k kubectl apply -f web-allow-all-ns-monitoring.yaml
Answer: B
NEW QUESTION # 56
You have a Kubernetes cluster with a service account named "my-sa" in the "my-namespace" namespace. You need to grant the service account the ability to read and write secrets in the "my-namespace" namespace and the ability to create pods in that namespace.
Create a Role and RoleBinding to achieve this using kubectl commands.
Answer:
Explanation:
See the solution below with Step by Step Explanation.
Explanation:
Solution (Step by Step) :
1 . Create the Role: Use the following command to create a role called 'sa-secret-pod-writer' in the 'my- namespace' namespace:
kubectl create role sa-secret-pod-writer--namespace=my-namespace --verb=get--verb=list --verb=watch verb=create --verb=update --verb=delete --verb=patch --resource=secrets --resource=pods --api-groups=""
2. Create the RoleBinding: Bind the role to the service account using the following command:
kubectl create rolebinding sa-secret-pod-writer-binding --namespace=my-namespace --role=sa-secret-pod- writer --serviceaccount=my-namespace:my-sa
3. Verify Access: Try running a pod using the service account "my-sa" in the "my-namespace" namespace. You should be able to successfully create the pod and access secrets within the namespace. You can test this by creating a pod definition with the 'serviceAccountName: my-sa' and include a volume mount to a secret within the "my-namespace" namespace.,
NEW QUESTION # 57
Set CPU and memory requests and limits for existing pod name
"nginx-prod".
Set requests for CPU and Memory as 100m and 256Mi respectively
Set limits for CPU and Memory as 200m and 512Mi respectively
- A. kubectl get po
kubectl set resources po nginx-prod --
limits=cpu=200m,memory=512Mi --requests=cpu=100m,memory=256Mi
//Verify
kubectl describe po nginx-prod - B. kubectl get po
kubectl set resources po nginx-prod --
limits=cpu=200m,memory=512Mi --requests=cpu=100m,memory=256Mi
//Verify
kubectl top po
kubectl describe po nginx-prod
Answer: B
NEW QUESTION # 58
Score: 7%
Task
Create a new nginx Ingress resource as follows:
* Name: ping
* Namespace: ing-internal
* Exposing service hi on path /hi using service port 5678
Answer:
Explanation:
Solution:
vi ingress.yaml
#
apiVersion: networking.k8s.io/v1
kind: Ingress
metadata:
name: ping
namespace: ing-internal
spec:
rules:
- http:
paths:
- path: /hi
pathType: Prefix
backend:
service:
name: hi
port:
number: 5678
#
kubectl create -f ingress.yaml
NEW QUESTION # 59
You are tasked with setting up fine-grained access control for a Kubernetes cluster running a microservices application. You need to ensure that developers can only access the resources related to their specific microservices while preventing them from accessing or modifying other services' resources. Define RBAC roles and permissions to achieve this, including details of the resources, verbs, and namespaces involved. Consider the following:
Answer:
Explanation:
See the solution below with Step by Step Explanation.
Explanation:
Specify the YAML configurations for roles, role bindings, and service accounts to enable the required access control, ensuring developers only have access to their respective microservice's resources within their assigned namespaces. Solution (Step by Step) : 1. Define Roles:
2. Create Service Accounts: apiVersion: vl kind: ServiceAccount metadata: name: order-service-sa namespace: order-service-ns -- apiVersion: vl kind: ServiceAccount metadata: name: payment-service-sa namespace: payment-service-ns -- apiVersion: vl kind: ServiceAccount metadata: name: inventory-service-sa namespace: inventory-service-ns 3. Bind Roles to Service Accounts: -- apiVersion: rbac.authorization.k8s.io/v1 kind: RoleBinding metadata: name: order-service-dev-binding namespace: order-service-ns roleRef: apiGroup: rbac.authorization.k8s.io kind: Role name: order-service-dev subjects: - kind: ServiceAccount name: order-service-sa namespace: order-service-ns -- apiVersion: rbac.authorization.k8s.io/v1 kind: RoleBinding metadata: name: payment-service-dev-binding namespace: payment-service-ns roleRef: apiGroup: rbac.authorization.k8s.io kind: Role name: payment-service-dev subjects: - kind: ServiceAccount name: payment-service-sa namespace: payment-service-ns -- apiVersion: rbac.authorization.k8s.io/v1 kind: RoleBinding metadata: name: inventory-service-dev-binding namespace: inventory-service-ns roleRef: apiGroup: rbac.authorization.k8s.io kind: Role name: inventory-service-dev subjects: - kind: ServiceAccount name: inventory-service-sa namespace: inventory-service-ns 4. Assign Service Accounts to Users: This step requires external authentication mechanisms like OIDC or LDAP. Assuming you have these mechanisms set up, you can associate the service accounts with specific users ('[email protected]' , '[email protected]', and '[email protected]') using the configured authentication provider. Roles: Define the specific permissions for each microservice developer within their respective namespaces. The roles allow developers to access resources like Pods, Deployments, Services, ConfigMaps, and Secrets related to their assigned microservice. Service Accounts: Service accounts are created in each namespace for each microservice, representing the identity of the developer group. Role Bindings: Role bindings connect the defined roles with the service accounts, granting the associated permissions. User Association: This step connects the service accounts with individual developers through external authentication mechanisms, enabling them to utilize the assigned permissions. By following these steps, you ensure that developers can only access and manage resources associated with their respective microservices within their assigned namespaces. This fine-grained access control policy effectively restricts access and prevents developers from interfering with other microservices or resources. ,
NEW QUESTION # 60
Your Kubernetes cluster has been running for some time, and it's becoming increasingly difficult to manage permissions for your applications. You are noticing a growing list of roles and role bindings, making it challenging to understand the relationships between them.
Describe a strategy to simplify and streamline your RBAC configuration by implementing best practices. Also, discuss how you can improve the manageability and auditing of your RBAC setup.
Answer:
Explanation:
See the solution below with Step by Step Explanation.
Explanation:
Solution (Step by Step) :
1. Implement a Hierarchical Structure:
- Create high-level roles for common tasks such as "admin," "developer," "viewer," etc., providing broad permissions.
- Build more specific roles for specific applications or services, inheriting permissions from the higher-level roles.
- Example:
- "admin" role: grants full access to the cluster.
- "app-developer" role: inherits from "admin," but with restricted permissions only to specific namespaces and resources related to the application.
- "app-viewer" role: inherits from "app-developer" with limited permissions for monitoring and viewing resources.
2. Utilize ClusterRoles for Global Permissions:
- ClusterRoles are designed to grant permissions across the entire cluster, simplifying management for resources that need consistent access.
- This allows for centralized control of common permissions, reducing duplication of role definitions.
3. Leverage Service Accounts for Application-Level Permissions:
- Create service accounts for each application and bind them to appropriate roles.
- Use service accounts to manage access for pods, deployments, and other resources related to a specific application.
- This reduces the need for manually assigning permissions to individual resources.
4. Adopt a Role-Based Structure:
- Design RBAC policies around roles instead of individual users.
- This allows for easier management of permissions by modifying roles rather than individual user bindings.
- Ensure users are assigned to appropriate roles based on their responsibilities.
5. Implement RBAC Auditing and Monitoring:
- Use tools like 'kubectl auth can-i' to test and validate RBAC permissions.
- Monitor RBAC events and changes using audit logging features.
- Analyze audit logs to identify any suspicious activity and troubleshoot RBAC issues.
6. Consider External RBAC Solutions:
- For larger deployments, consider using external RBAC solutions like Keycloak or OpenLDAP for centralized user management and role-based access control.
- This can simplify the process of managing users, roles, and permissions across multiple clusters.
7. Documentation:
- Maintain comprehensive documentation of your RBAC setup, including roles, bindings, and any specific permissions.
- This documentation will be crucial for future maintenance, debugging, and troubleshooting. ,
NEW QUESTION # 61
List all the pods showing name and namespace with a json path expression
Answer:
Explanation:
kubectl get pods -o=jsonpath="{.items[*]['metadata.name', 'metadata.namespace']}"
NEW QUESTION # 62
Apply the autoscaling to this deployment with minimum 10 and maximum 20 replicas and target CPU of 85% and verify hpa is created and replicas are increased to 10 from 1
Answer:
Explanation:
kubectl autoscale deploy webapp --min=10 --max=20 --cpu percent=85 kubectl get hpa kubectl get pod -l app=webapp
NEW QUESTION # 63
You have a deployment named 'my-app' running a web application that uses an external database service. You need to configure a 'ClusterlP' service to route traffic to the external database service.
Answer:
Explanation:
See the solution below with Step by Step Explanation.
Explanation:
Solution (Step by Step) :
1 . Create the ClusterlP service:
- Create a 'ClusterlP' service that points to the external database service using the 'externalName' field.
2. Apply the service: - Apply the YAML file using 'kubectl apply -f external-db-service.yamr 3. Verify the service: - Check the status of the service using 'kubectl get services external-db-service -n ' 4. Test the service: - From a pod in the same namespace as the service, try to connect to the external database service using the 'external-db-service' service name and port. Note: - Replace with the actual namespace. - Replace 'my-external-db.example.com' with the actual hostname of your external database service. - Ensure that your cluster has access to the external database service.
NEW QUESTION # 64
......
The CKA exam is a hands-on, performance-based exam that requires candidates to perform tasks on a live Kubernetes cluster. CKA exam lasts for two hours and consists of 24 performance-based tasks. Candidates must complete all tasks within the allocated time frame to pass the exam. CKA exam is proctored, and candidates must have a webcam to ensure the integrity of the exam.
CKA certification dumps - Kubernetes Administrator CKA guides - 100% valid: https://www.testkingfree.com/Linux-Foundation/CKA-practice-exam-dumps.html
100% Pass Your CKA at First Attempt with TestKingFree: https://drive.google.com/open?id=1BTYeJnLwnGaqX5WqEWdp6D9qG1U_WiWY